(Also see this related YouTube video: Detecting rotation angles with Darknet/YOLO.)
TLDR Summary
YOLO can be used to help determine when certain images need to be rotated. This post explains how to determine the exact rotation angle to apply, and how it impacts the prediction results.
Film and Perfs
Small objects or easily identifiable portions of images may be used to help orient an image. If you can detect these key locations -- and you know where those objects are supposed to be located! -- you can then use the coordinates to rotate images back to a level position. Round objects, such as screw heads or circular coloured stickers, are better than square or rectangle objects since the bounding boxes of round objects won't be impacted by image rotation. If round ojects are not available, then small objects with a square aspect ratio will work better than large rectangular objects.
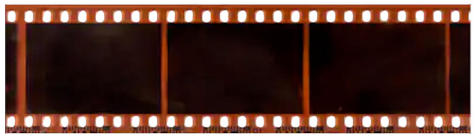
For this example post, we're going to use film strip images like this:
This is an example dataset -- not a real project -- but let's assume we want to capture the individual frames. The perforations are unecessary for the extraction of the frames, but for Darknet/YOLO we'll annotate the leftmost and rightmost perfs and use the information they provide to help determine the rotation angle.
So the annotated training images look like this:
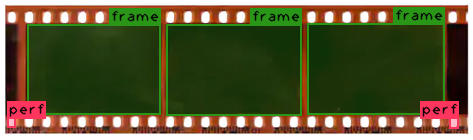
What we need are two (or more) landmarks with known positions relative to each other. In the case of this example, the perfs should be on the same row for a perfectly level image.
Rotated Images
When we get a rotated image, the results from Darknet/YOLO will be difficult to use. With the Perfs.zip file extracted to a folder, run this command: "DarkHelp --autohide off Perfs.cfg Perfs.names Perfs_best.weights film2.jpg". The results should look like this window:
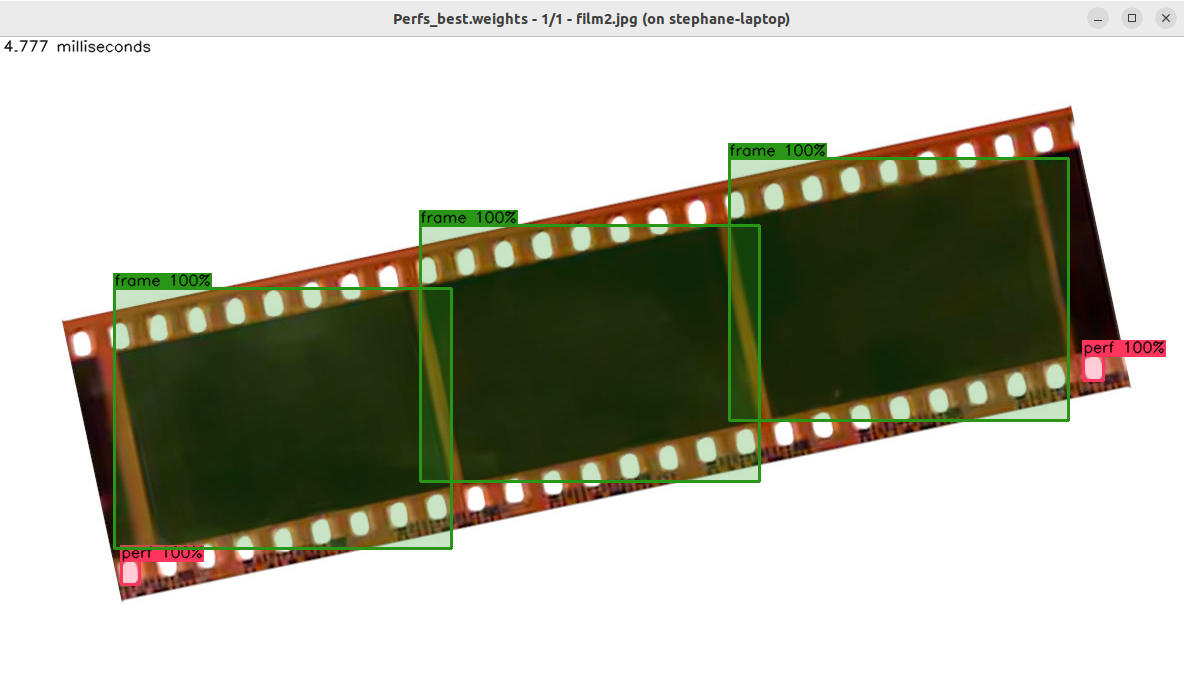
Extracting the frames from this image is problematic, which is why we want to rotate the image back to level.
Instead of running the DarkHelp CLI, try this command from DarkHelp's example src-apps directory: "rotate_images Perfs.cfg Perfs.names Perfs_best.weights film2.jpg". This should display 3 windows.
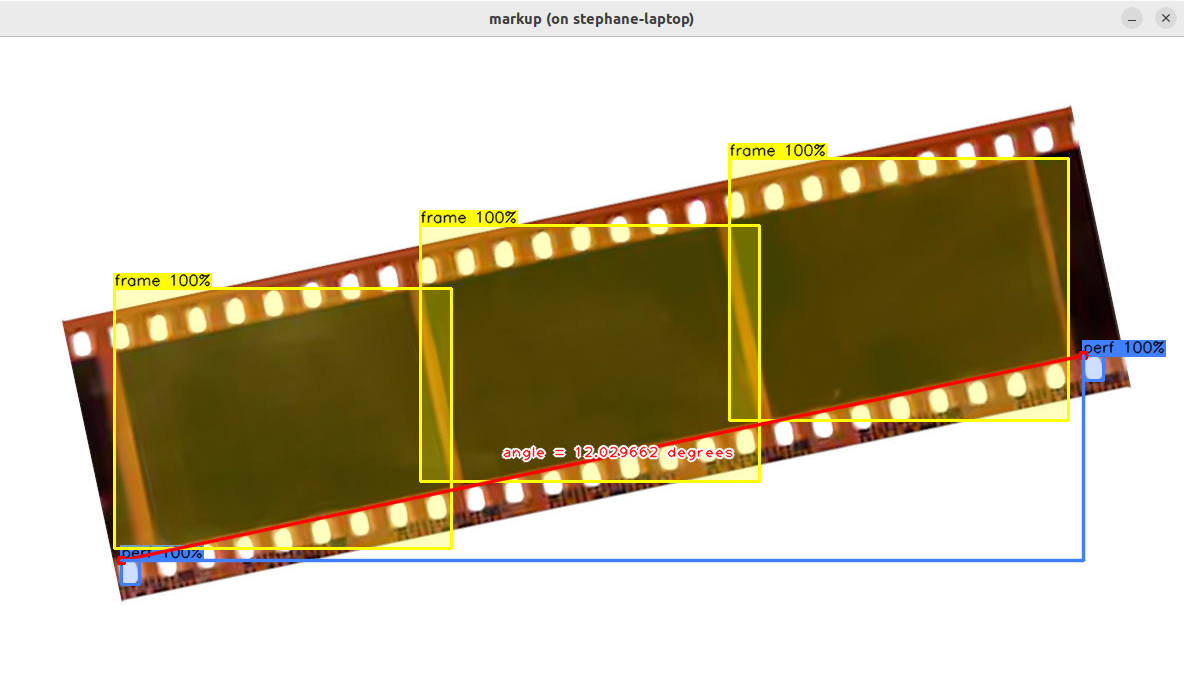
The first window, similar to the one above from DarkHelp, shows the results of applying the neural network on the image:
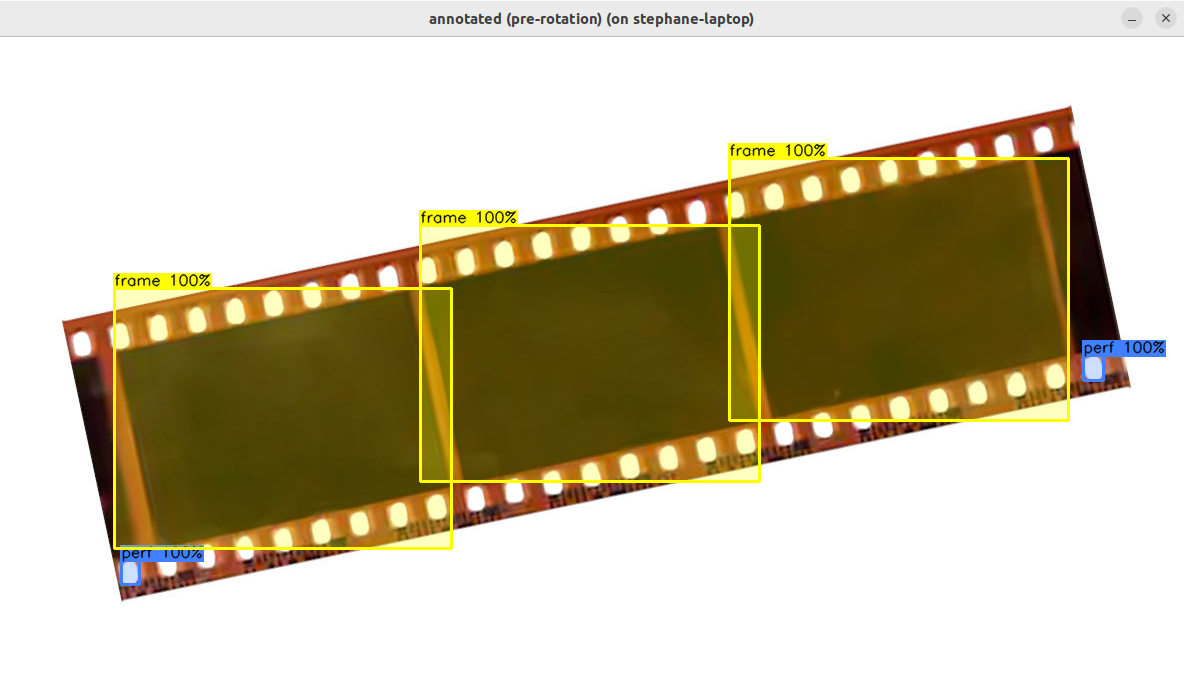
The second window shows the calculations made to determine the exact rotation angle. The top-left corner coordinates of the leftmost and rightmost perforations are compared, and using math with the help of std::atan2() the rotation angle is calculated to be 12.029662 degrees. For purely debug purposes, OpenCV drawing functions are then used to further annotate the image and display what we're detecting and how it impacts calculations. Note the blue lines that link the two landmarks, as well as the red line and the red text that shows the angle of the hypotenuse.
Once the angle is known, OpenCV is used to counter-rotate the image -12.029662 degrees. This gives us a perfectly level object, on which we must re-run the neural network. The results of which are shown in this 3rd window:
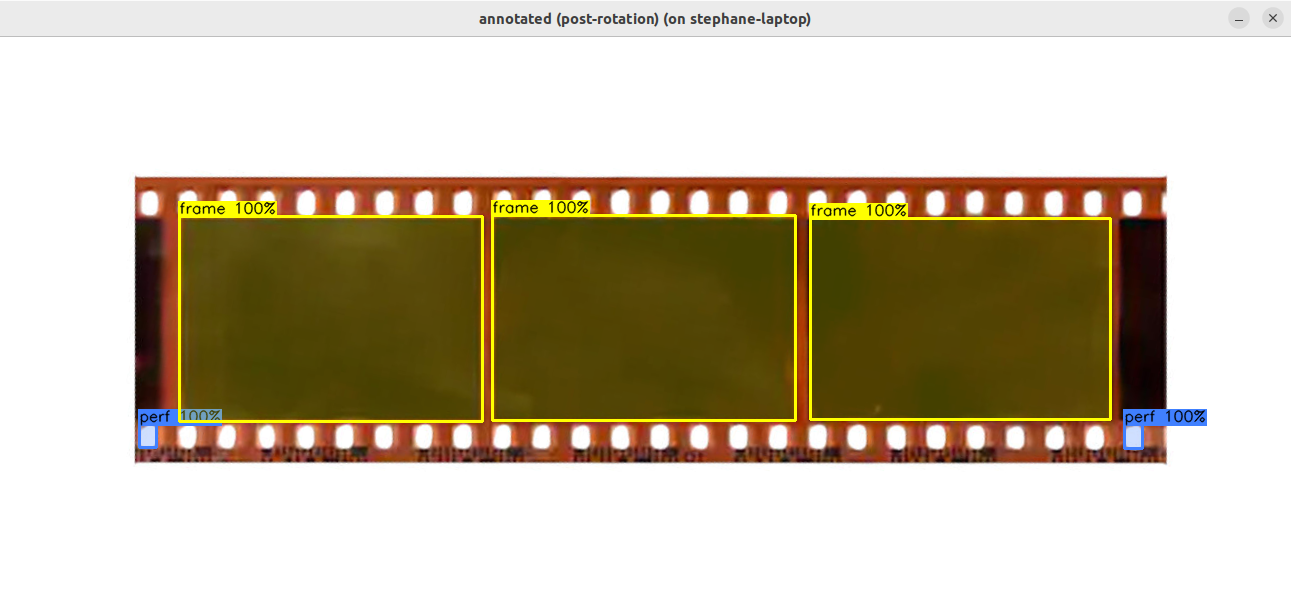
Having the image perfectly level allows Darknet/YOLO to correct detect and return the coordinates of each frame. It is then a trivial task to cut out the frames from the counter-rotated image.
The full source code to rotate_images is available in the DarkHelp repo, as linked above. The key section is where the two landmark coordinates are used to calculate the rotation angle:
After obtaining the rotation degrees, the image is rotated using the usual OpenCV technique:
Once everything is done, remember to feed the counter-rotated image through the Darknet/YOLO network a 2nd time to generate predictions against the "level" object.
