| Order | Customer | Status | Schedule | Wood | Profile | Doors | Drawers | Solid | Plywood | Dovetail Drawer Boxes | Butcher Blocks | Miscellaneous | Invoice | History |
Manage doors.
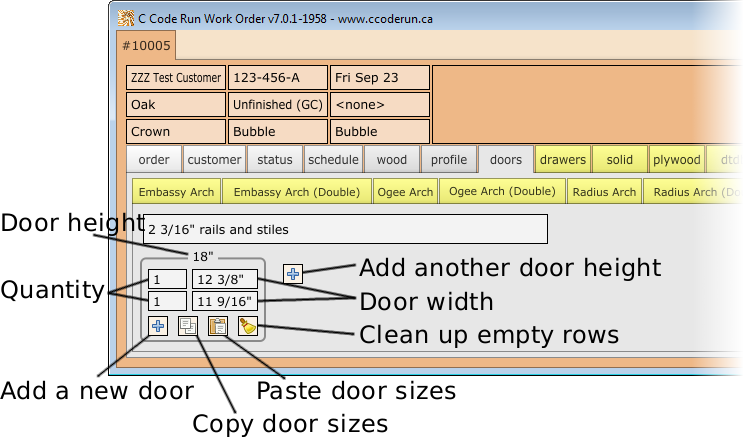
To create new doors:
"+" icon or press CTRL+H to create a new height group.18. Press TAB.1. Press TAB.12 3/8. Press TAB.18" high doors, pressing TAB to advance to the next field, or SHIFT+TAB to move backwards.Things to note:
To remove a single door, change either the quantity or the width to zero. The doors with an invalid quantity or width will be removed when:
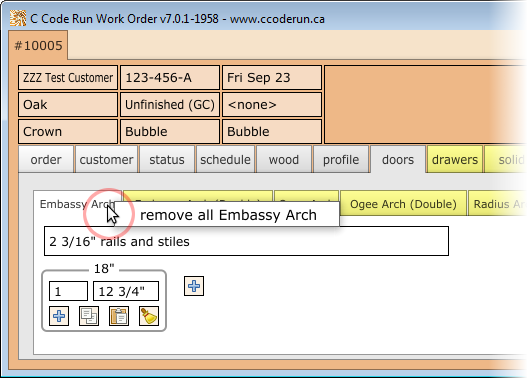
"broom" icon is clicked to clean up the group,CTRL+E tells the Work Order software to clean up empty and invalid rows.To remove all doors from a specific tab, right-mouse-click on the tab name and select "remove all". For example:
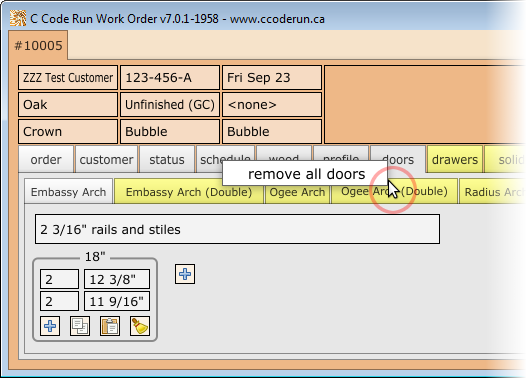
This can also be done to the top "door" tab to remove all doors, regardless of type. For example:
Rails and stiles can be set for every door, or can be customized on a door-by-door basis.
To set the global rails and stiles, click on the entryfield with the size of the rails and stiles. This determines the rails and stiles used by any door which does NOT have a local override for rails and stiles.
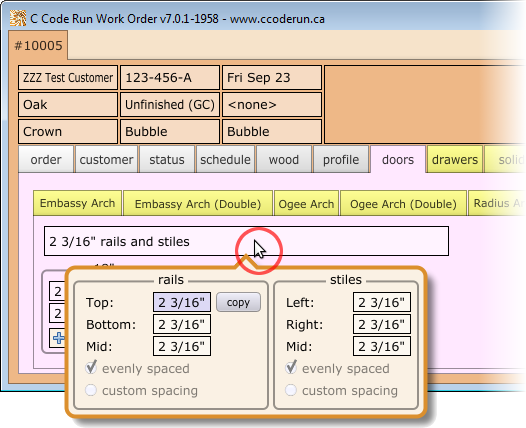
The copy button copies the top rail to all other fields.
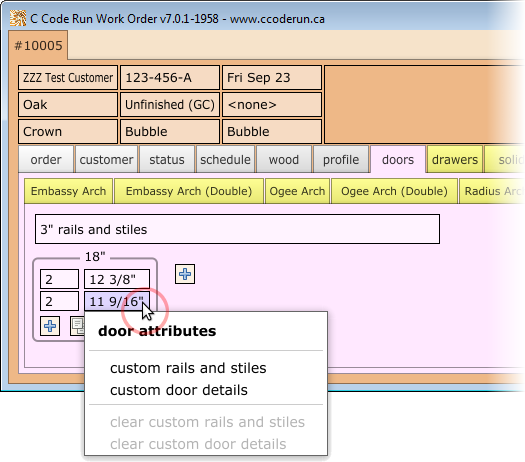
To set the rails and stiles on a per-door basis, press CTRL+ENTER or right-mouse-click on either the quantity or the door width. Select or click on "custom rails and stiles".
Customized rails and stiles that differ from the global rails and stiles will be shown beneath the door. For example:
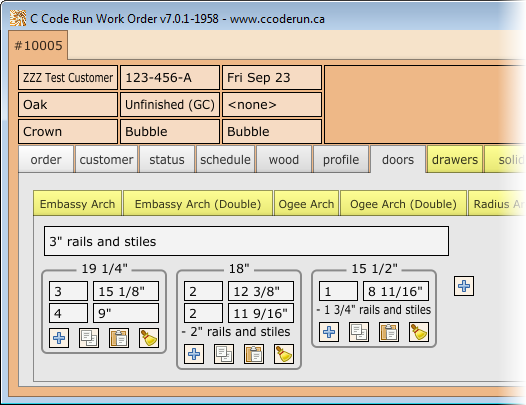
In this example, nine doors will use the global 3" rails and stiles, two doors are set to 2" rails and stiles, and one door has 1 3/4" rails and stiles.
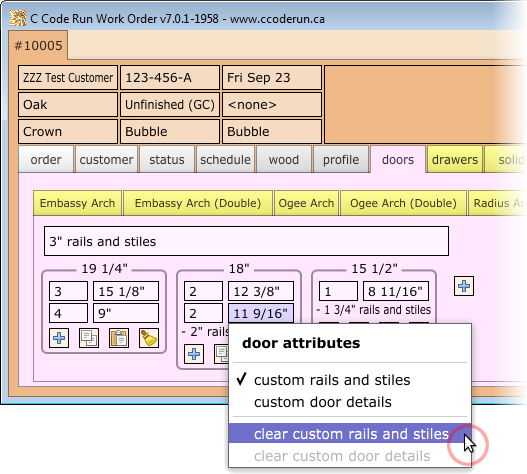
To remove custom rails and stiles, right-mouse-click on either the quantity or the door width. Select or click on "clear custom rails and stiles". For example:
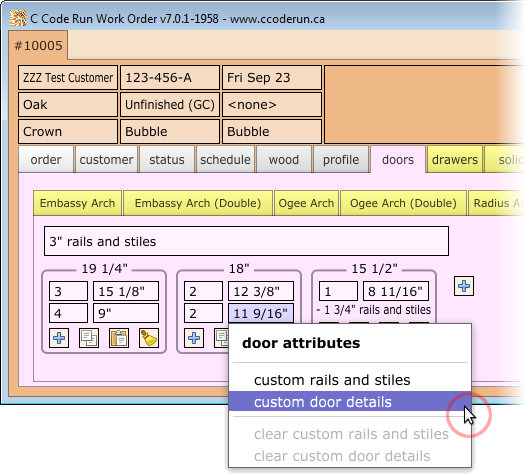
Similar to custom rails and stiles, the custom door details are accessed either through CTRL+ENTER or with a right-mouse-click on either the quantity or the door width. For example:
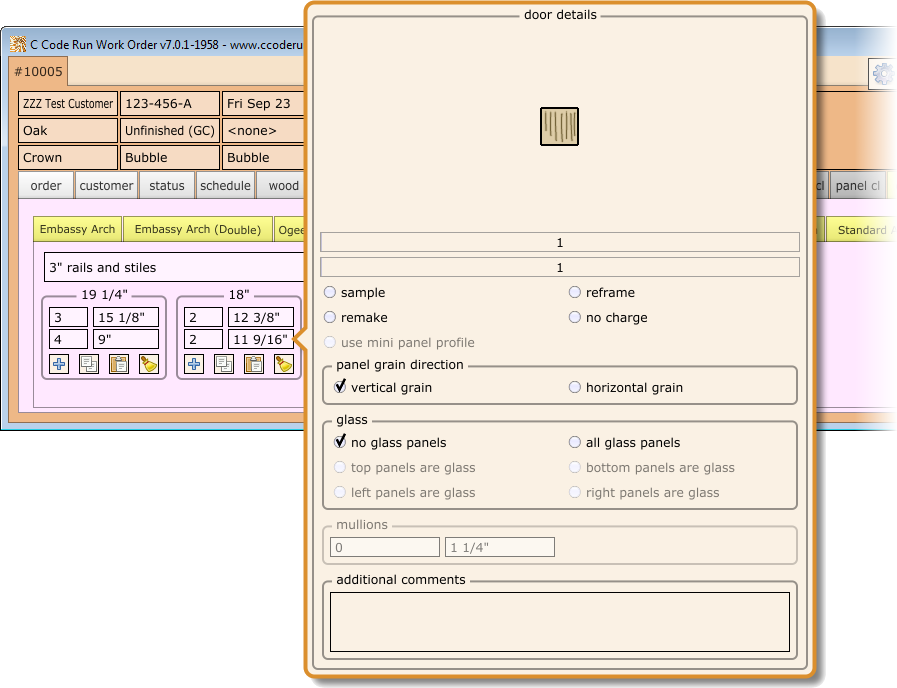
The custom door details allow the following to be configured:
| Control | Definition |
|---|---|
| (first slider bar) | Number of vertical panels. Slide to change the value, or click to type a number. |
| (second slider bar) | Number of horizontal panels. Slide to change the value, or click to type a number. |
| sample | Doors marked as sample have 10% off on the invoice. |
| reframe | Build a frame around an existing panel. Invoiced as if it was a 'glass' panel door. |
| remake | A problem was discovered with the original door, requiring it to be remade. The door will be 100% off on the invoice. |
| no charge | Similar to remake, the door will be 100% off on the invoice. |
| use mini panel profile | Some panel profiles have a corresponding 'mini' profile available allowing smaller 5-piece doors to be built.
|
| vertical grain | This is the default for doors. |
| horizontal grain | This is the default for drawers. |
| no glass panels | This is a normal wood door. |
| all glass panels | This is a wood frame into which glass panels will be inserted. |
| mullions | Number and size of mullions. Zero indicates no mullions. |
| additional comments | Each line of text appears as an additional bullet on printouts. |
When creating or editing doors, some shortcuts can be used to toggle often-used items from the custom door detail screen. This includes things like glass panels, multiple panels, and several additional comments. All of these are listed on the Keyboard Shortcuts window:

To use the shortcuts, insert a space between the door width and the shortcut. For example, to create a 10" wide door with a glass frame:
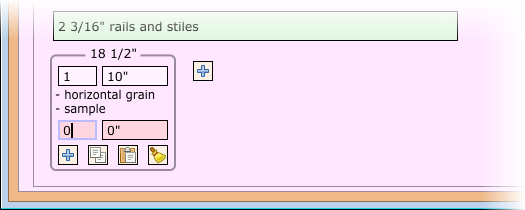
To use more than one shortcut, insert a space between each one. For example, to create a sample door with horizontal grain:
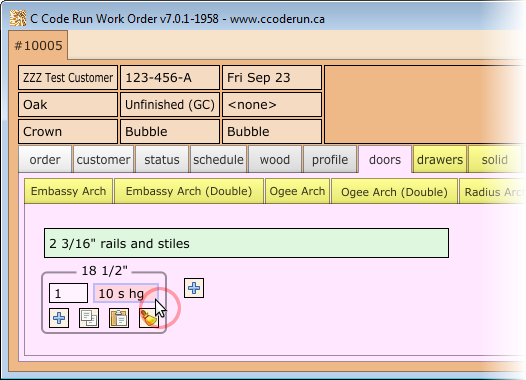
Once the text is parsed, it should look like this:
